While RELMA is a Windows-only application, it is possible to run our software on macOS computers. This guide will walk you through the process of installing RELMA within a virtual environment on a Mac.
A virtual machine is actually system emulation that behaves like a computer within a computer. For more information on this technology, see Wikipedia's article on Hardware virtualization.
- The only prerequisite is an Apple Mac computer—desktop or laptop—running a recent version of macOS software.
- Depending on your download and computer speeds, the entire process takes about 2 hours to complete. There is considerable sit-and-wait time so it's possible to do other work simultaneously.
- With the exception of Microsoft Windows, all software is free to download. If you are affiliated with a college or university, you may have free access to Windows and other Microsoft software. Check with your campus's information services. Otherwise, Windows licensing costs vary by business, education, or home use. Details on obtaining the software follow.
1 Download Windows
You will need to download the disc image (ISO file) of Microsoft Windows. More than likely you will want to choose the 64-bit version of the software. For the purposes of installing RELMA, it should not matter which edition of Windows you select, e.g. Home versus Pro. Choose your appropriate product language.
Download Windows 10 Disc Image
The file is approximately 4GB in size so it may take some time to download, depending on your connection. You can continue installing the other software below while you wait.

2 Download and install VirtualBox
We will be installing Windows within the VirtualBox software from Oracle. Alternatives include VMware Fusion and Parallels Desktop. We recommend VirtualBox as it is free and well-maintained software.
VirtualBox is available for several platforms so be certain to select the version for "OS X hosts." If the downloaded file does not open automatically, double-click the .dmg file to open the window shown in the first image below. Double-clicking the "VirtualBox.pkg" icon will then guide you through the installation process.
TIP Click on any of the images below to view them larger.


3 Open VirtualBox and create a new machine
From within your computer's Applications folder, open VirtualBox. In the resulting VirtualBox Manager window, click "New" to create a new virtual machine. It will prompt you for name, operating system type, and version. Any name will do. Enter the version of Windows you have downloaded, presumably 64-bit Windows 10.
Next it will ask about memory size. The default 2048MB is sufficient. For hard disk, opt for a new, dynamically-allocated virtual hard disk (VDI) set to 32GB. If you intend to copy other work files to Windows, you may want to increase this amount to 64GB or more.
TIP You can adjust most of your VM's settings after its initial creation. This is a good way to increase system memory, if necessary, and network your virtual computer. Some options require the machine be in a "powered off" state to allow changes.
4 Install Windows
Following set up of the new VM in Step 3, you should now have a new "Powered Off" virtual machine with the name you chose. Double-click it to start. Hopefully by now your Windows software download is complete. VirtualBox will prompt you to locate the .iso file you downloaded. It will most likely be in your computer's Downloads folder. Once identified, hit "Start" to begin the Windows installation.
Your new virtual environment may restart a few times as Windows advances through its normal setup procedure. Enter the other options such as username and password as you or your organization see fit. The installer may also retrieve the latest software updates. The entire setup may take an hour to complete.
Windows will prompt you for personalized settings such as language and time. It will also ask you to enter the product activation key. You should have received this 25-character alphanumeric code when you licensed Windows.

Upon first launch of your VM, this is where you will be prompted to identify the Windows ISO file you downloaded previously.

We recommend you choose the "Custom: Install Windows only" option. You can copy files such as LMOF and mappings after installation.

Once installation is complete you will reach a standard Windows desktop screen.
5 Download and install RELMA
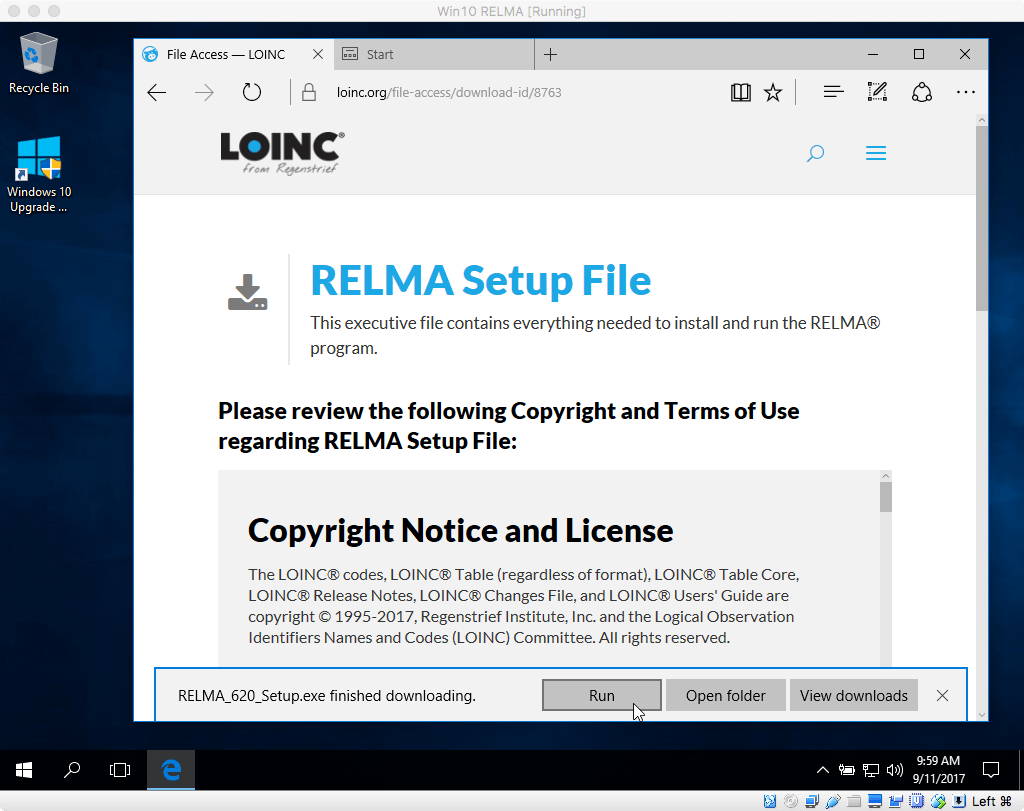
From within your new Windows desktop, download the RELMA installer file. Launch the Edge browser (or Internet Explorer) from the Windows Start menu. Navigate to loinc.org/relma. You will need to log in and agree to the license in order to download the file.
Once the download is complete, run the "RELMA_xxx_Setup.exe" file. You will be prompted to allow the installer app to make changes to your device. The installer will then load any RELMA prerequisites. Next RELMA itself will be installed within the Windows virtual machine.
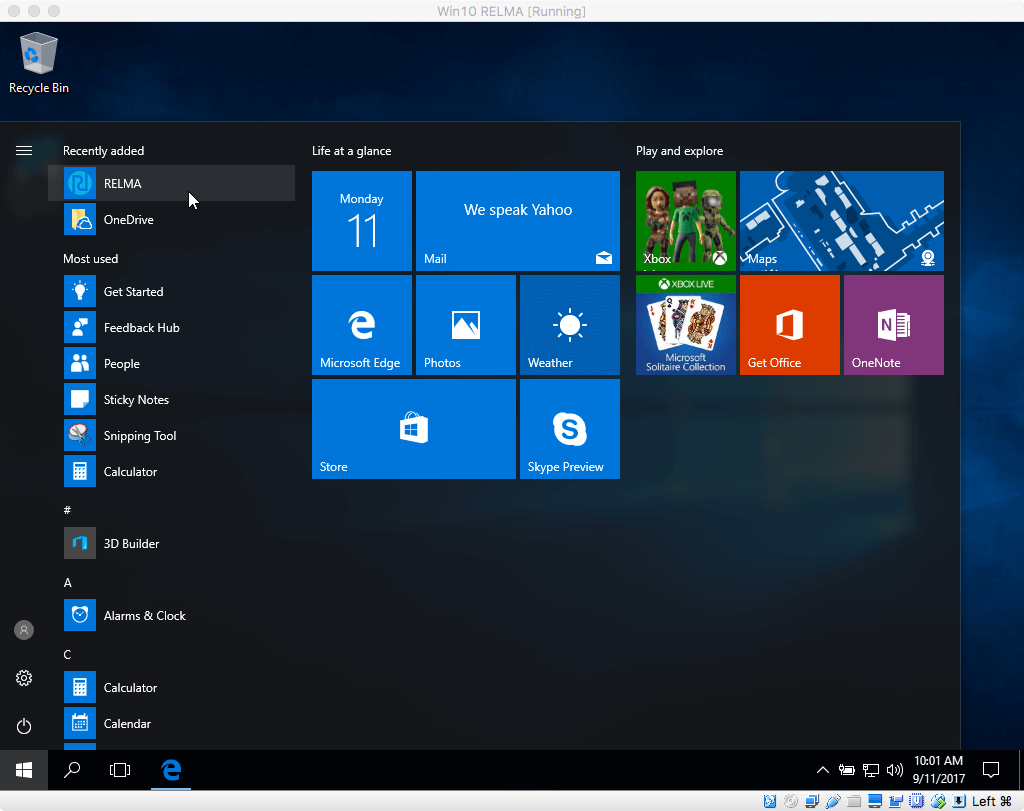
Once the setup is complete, you can access RELMA from the Windows Start menu. It will appear at the top or alphabetically under "R" in a folder named Regenstrief Institute.

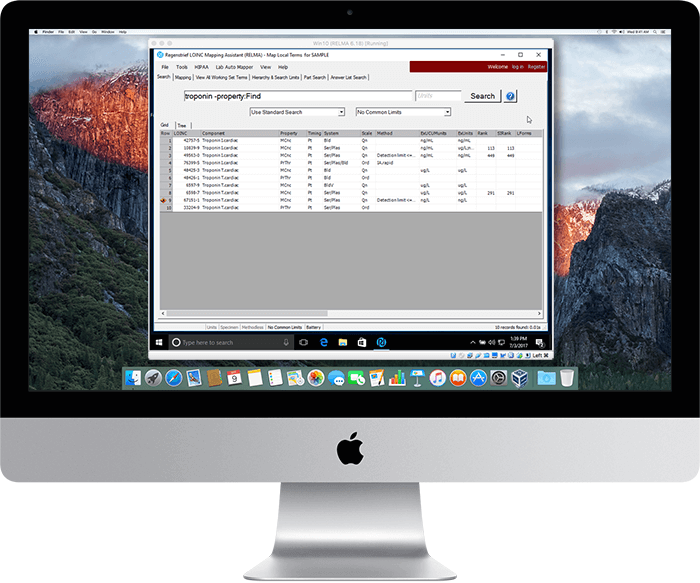
After agreeing to the license and logging in you will reach RELMA's familiar main menu.

When you are ready to quit, click the usual red circle to exit. You will be prompted to save machine state. This will allow you to quickly resume from where you left off.
OPTIONAL Share a folder
The new Windows virtual computer is isolated within your Mac. There are a few ways to get files in and out. We suggest a shared folder that exists as a conduit between the two platforms.
To establish one, go back to your VirtualBox Manager. If your Windows VM is running or in a saved state, you'll want to power it off. You can right-click on the VM name and select Close Power Off. Now click the Settings icon and select "Shared Folders." Click the plus-sign icon to create a new share. In the resulting window click the down arrow next to "Folder Path:" and select "Other." You will be asked to select an existing folder—or create a new one—on your Mac. The location is up to you. After establishing the folder, be certain to check the "Auto-mount" option, hit OK, and then OK again to exit the settings.
Start the Windows VM again by double-clicking its name or hitting the Start icon. Log in to Windows. Then, on your Mac's toolbar, click on Devices Insert Guest Additions CD image.... Windows will prompt you that a disc has been inserted. Follow this path to install the software. It enables extra functionality including shared folders. Once the installation is complete and the VM reboots, you should have a folder common to both Mac and Windows operating systems.

A
Power off your VM from the Manager and choose Settings.
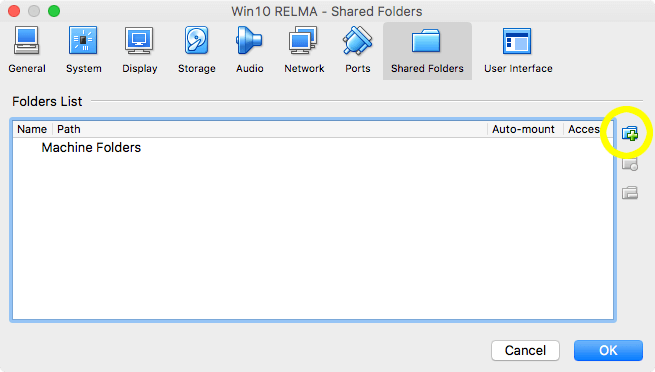
B
Then select Shared Folders and click + to add.

C
Click the down arrow to make/choose a shared folder.

D
Boot your VM, log in, and select “Install Guest Additions”
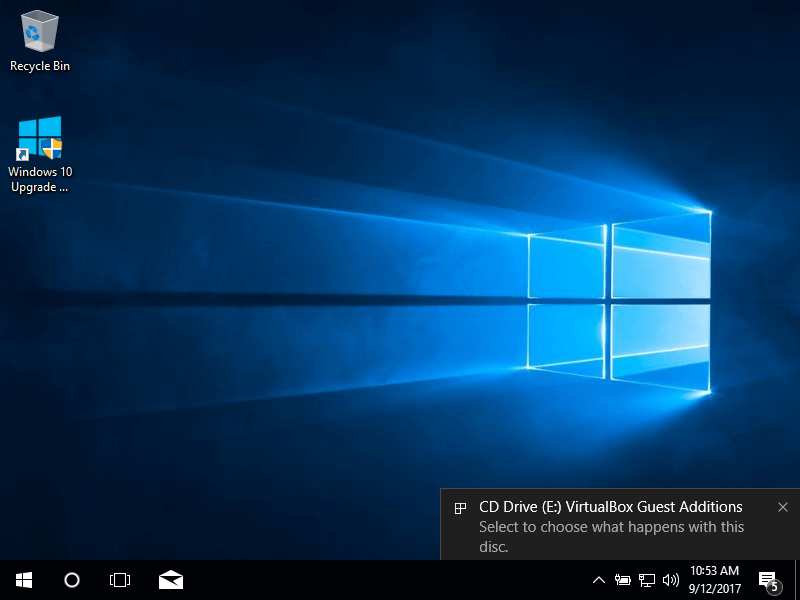
E
Windows will recognize the Guest Additions disc.

F
Follow the install process and reboot the device as directed.
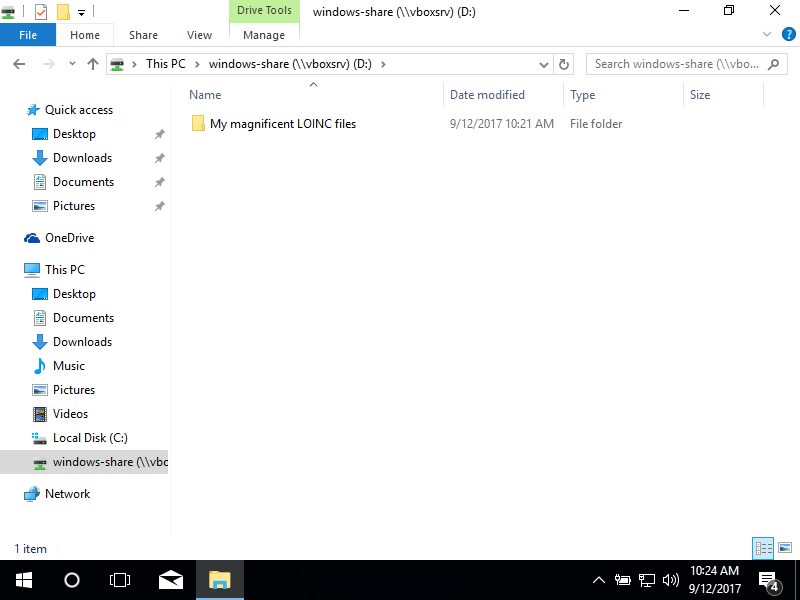
G
After Windows reboots, you’ll see the the shared folder within File Explorer…

H
…and within Mac.
Congratulations! You have successfully installed RELMA on your macOS computer.
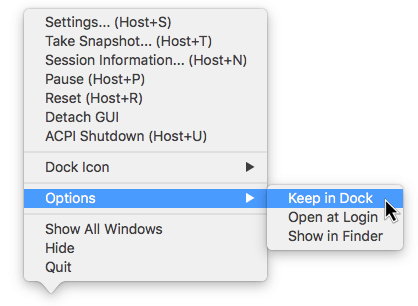
TIP Keep your Windows virtual machine in your Mac's dock for quick access. While the VM is running, right-click on its icon within the dock. Go up to "Options" and then over to "Keep in Dock." Now RELMA will be conveniently located for future use.